Baking chicken breast is one of the healthiest and easiest ways to prepare a delicious meal. However, many people struggle with dry or flavorless chicken. The secret to making juicy, tender baked chicken breast lies in choosing the right temperature, seasoning, and cooking method.
In this guide, we’ll explore:
✔️ The best temperature to bake chicken breast
✔️ Proven tips to keep it moist and flavorful
✔️ Step-by-step recipe for the juiciest baked chicken breast
✔️ FAQs on covering, seasoning, and storing baked chicken
By the end of this article, you’ll master the art of making perfect baked chicken breast every time!
Table of Contents

Why Baked Chicken Breast is a Healthy Choice
Nutritional Benefits of Chicken Breast
Chicken breast is one of the healthiest protein sources. It’s:
- High in Protein – About 31g of protein per 100g serving
- Low in Fat – Especially when skinless
- Rich in Vitamins & Minerals – Contains B vitamins, phosphorus, and selenium
- Heart-Healthy – No trans fats and low in saturated fat
For those on a high-protein, low-carb, or calorie-controlled diet, baked chicken breast is an excellent option.
Why Baking is Healthier than Frying
Compared to frying, baking has several health benefits:
✅ Uses less oil, reducing calorie intake
✅ Retains more nutrients compared to deep-frying
✅ Produces less harmful compounds than high-heat frying methods
✅ Creates a crispy yet juicy texture with the right techniques
For a healthy yet delicious meal, baking is the way to go!
Choosing the Right Chicken Breast for Baking
The quality of your chicken breast can significantly impact the flavor, texture, and overall success of your baked chicken recipe. Here’s what to consider when selecting the best chicken breast for baking.
Fresh vs. Frozen Chicken: What’s Better?
When buying chicken breast, you’ll typically find two options: fresh or frozen. Each has its pros and cons:
| Type | Pros | Cons |
|---|---|---|
| Fresh | – More tender and flavorful |
- Cooks more evenly
- No need to thaw | – Shorter shelf life
- Can be more expensive |
| Frozen | – Longer shelf life - More budget-friendly
- Convenient for meal planning | – Needs proper thawing
- May have excess moisture if not defrosted correctly |
👉 Best choice? If you plan to cook immediately, go for fresh chicken. If you prefer to stock up, frozen chicken is a great option—just make sure to thaw it properly in the refrigerator overnight.
Organic, Free-Range, or Conventional: Which to Choose?
You may have noticed different labels on chicken breast packages. Here’s what they mean:
- Organic Chicken – Raised without antibiotics, fed organic feed, and free from synthetic hormones.
- Free-Range Chicken – Has access to outdoor space, resulting in better muscle quality and potentially richer flavor.
- Conventional Chicken – Typically raised in controlled environments; can still be a good option if sourced from reputable farms.
✅ Best choice? If budget allows, organic or free-range chicken is recommended for better quality and taste. However, conventional chicken is still a great option if cooked properly.
How to Properly Prepare Chicken Breast for Baking
Proper preparation is key to ensuring your baked chicken breast turns out juicy, tender, and full of flavor. Here’s how to do it right.
Trimming and Cleaning Chicken Breast
Before cooking, follow these simple steps to clean and trim your chicken breast:
- Rinse (Optional): While some people prefer not to rinse raw chicken (to prevent contamination), if you do, make sure to pat it dry completely.
- Trim Excess Fat: Use a sharp knife to remove any excess fat, tendons, or connective tissue for a cleaner texture.
- Pound to Even Thickness: Place the chicken between two sheets of plastic wrap and gently pound it using a meat mallet or rolling pin. This ensures even cooking and prevents dry, overcooked edges.
Brining vs. Marinating: What Works Best?
To enhance the juiciness and flavor of baked chicken breast, consider either brining or marinating.
Brining (For Maximum Juiciness)
A simple saltwater brine helps the chicken retain moisture while baking.
How to brine:
- Dissolve ¼ cup of salt in 4 cups of water.
- Submerge chicken breasts and refrigerate for 30 minutes to 1 hour (don’t overdo it, or it may get too salty).
- Rinse and pat dry before seasoning.
👉 Best for: Extra juicy chicken with minimal effort.
Marinating (For Extra Flavor)
Marinating infuses the chicken with rich flavors and helps tenderize it.
Basic marinade recipe:
- ¼ cup olive oil
- 2 tbsp lemon juice or vinegar
- 1 tsp salt + ½ tsp pepper
- 1 tsp garlic powder or minced garlic
- 1 tsp Italian seasoning or herbs of choice
Mix ingredients, coat the chicken, and marinate for at least 30 minutes (or up to 12 hours for deep flavor).
👉 Best for: Adding bold flavors and a bit of tenderness.

The Best Seasonings for Baked Chicken Breast
Seasoning plays a crucial role in turning plain chicken breast into a flavorful, mouthwatering dish. Whether you prefer a simple salt-and-pepper mix or a bold, spicy rub, the right seasonings can make all the difference.
Simple Salt & Pepper Mix for a Classic Taste
If you want a basic yet delicious baked chicken breast, keep it simple with:
✔️ Salt – Enhances natural flavors and helps retain moisture
✔️ Black Pepper – Adds a mild kick and depth
✔️ Olive Oil – Helps the seasonings stick and keeps the chicken juicy
👉 Best for: Those who love a natural, mild flavor without overpowering spices.
Flavorful Marinades & Dry Rubs to Try
If you want more variety, try these delicious seasoning options:
1. Garlic Herb Seasoning (Savory & Fresh)
- 1 tsp garlic powder
- 1 tsp onion powder
- 1 tsp Italian seasoning
- ½ tsp paprika
- ½ tsp salt & black pepper
👉 Pairs well with: Roasted vegetables or mashed potatoes.
2. Spicy Cajun Rub (Bold & Smoky)
- 1 tsp cajun seasoning
- ½ tsp smoked paprika
- ½ tsp garlic powder
- ¼ tsp cayenne pepper (adjust for spice level)
👉 Pairs well with: Rice, corn, or grilled veggies.
3. Lemon Pepper Seasoning (Zesty & Bright)
- 1 tsp lemon zest
- ½ tsp black pepper
- ½ tsp garlic powder
- ½ tsp salt
👉 Pairs well with: Steamed broccoli or quinoa.
4. Honey Mustard Glaze (Sweet & Tangy – Best for Caramelization)*
- 2 tbsp honey
- 1 tbsp Dijon mustard
- 1 tsp apple cider vinegar
- ½ tsp garlic powder
👉 Pairs well with: Roasted sweet potatoes or salad.
How to Apply Seasoning for Best Flavor
- Pat chicken dry to help the seasoning stick better.
- Brush with olive oil or melted butter before seasoning.
- Rub seasoning evenly over both sides of the chicken breast.
- Let it rest for 10-15 minutes before baking for deeper flavor absorption.
💡 Pro Tip: For extra depth, combine dry rubs with a light marinade and let the chicken rest for at least 30 minutes before baking!
The Ideal Temperature & Cooking Time for Baking Chicken Breast
One of the biggest mistakes people make when baking chicken breast is using the wrong temperature or overcooking it, which results in dry, tough meat. Here’s how to get it just right.
Is it Better to Bake Chicken at 350°F or 400°F?
Both 350°F (177°C) and 400°F (204°C) work for baking chicken breast, but each has different results:
| Temperature | Result | Best For |
|---|---|---|
| 350°F (177°C) | Slower cooking, softer texture | Juicier chicken with mild browning |
| 400°F (204°C) | Faster cooking, crispier edges | A balance of tenderness and browning |
👉 Best choice? 400°F is ideal if you want chicken that is moist inside with a slightly crisp outside. However, if you’re worried about dryness, 350°F is a safer option.
How Long to Bake Chicken Breast for the Perfect Texture?
Cooking time depends on the thickness of your chicken breast:
| Chicken Breast Thickness | 350°F (177°C) Bake Time | 400°F (204°C) Bake Time |
|---|---|---|
| Thin (½ inch or less) | 20-22 minutes | 16-18 minutes |
| Medium (¾ inch – 1 inch) | 25-30 minutes | 20-22 minutes |
| Thick (1½ inches or more) | 35-40 minutes | 25-30 minutes |
How to Tell If Chicken is Done?
✅ Use a Meat Thermometer: Insert into the thickest part—it should read 165°F (74°C).
✅ Check Juices: If the juices run clear (not pink), the chicken is cooked.
✅ Firmness Test: The chicken should feel firm but not rock-hard when pressed.
💡 Pro Tip: Let the chicken rest for 5-10 minutes after baking to allow the juices to redistribute, making it even juicier!
How to Keep Chicken Breast Moist When Baking
Baked chicken breast often dries out because it’s naturally lean. To keep it juicy, follow these proven techniques:
Should You Cover Chicken When Baking?
Covering the chicken breast while baking traps moisture and prevents it from drying out. However, whether or not to cover it depends on the cooking method:
| Baking Style | Covered or Uncovered? | Result |
|---|---|---|
| Low & Slow (350°F) | Cover for the first 20 mins, then uncover | Extra juicy, less browning |
| High Heat (400°F) | Bake uncovered | Crispier outside, slightly drier inside |
👉 Best choice? If using low heat (350°F), cover for part of the time. If using high heat (400°F), bake uncovered for a slightly crispier texture.
Using Foil, Butter, or Broth for Extra Juiciness
To lock in moisture, try these methods:
✅ Foil Tent Method: Loosely cover with foil for the first half of baking to prevent drying. Remove it to allow slight crisping.
✅ Butter Baste: Brush with melted butter before and after baking for extra richness.
✅ Broth Trick: Pour ¼ cup of chicken broth in the baking dish to steam the chicken while baking.
Other Moisture-Boosting Tips
✔️ Pound the chicken to an even thickness before baking
✔️ Don’t skip brining or marinating—this helps with moisture retention
✔️ Let the chicken rest for 5-10 minutes after baking before slicing
💡 Pro Tip: Slicing chicken immediately after baking releases all the juices—wait a few minutes for the best results!

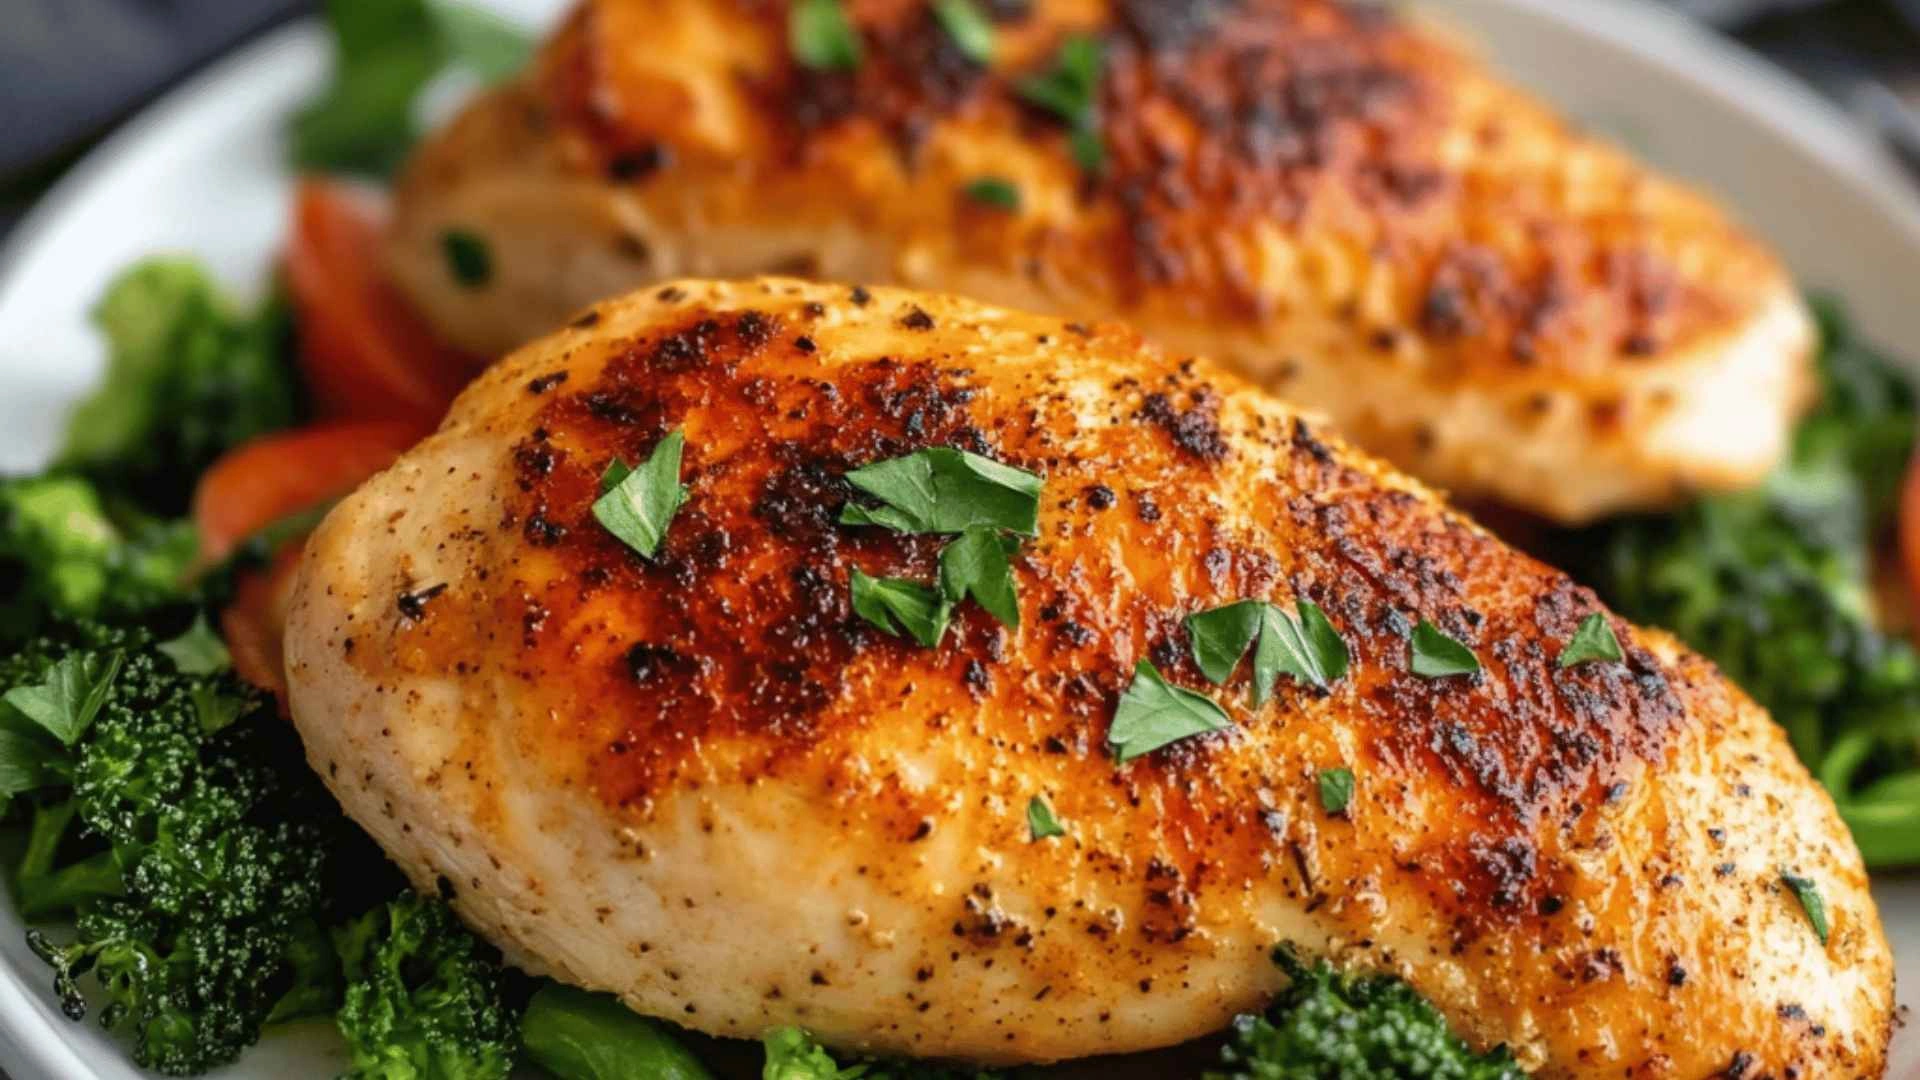
Step-by-Step Recipe for the Juiciest Baked Chicken Breast
Ingredients
Here’s what you’ll need:
✔️ 2 large boneless, skinless chicken breasts
✔️ 2 tbsp olive oil or melted butter
✔️ 1 tsp salt
✔️ ½ tsp black pepper
✔️ 1 tsp garlic powder
✔️ ½ tsp onion powder
✔️ 1 tsp paprika (for color and mild smokiness)
✔️ ½ tsp Italian seasoning or dried herbs
✔️ 1 tbsp lemon juice (optional, for added tenderness)
💡 Optional: Add ¼ cup chicken broth to the baking dish for extra moisture.
Step-by-Step Instructions
Step 1: Preheat the Oven
- Set your oven to 400°F (204°C) for the perfect balance of crispiness and moisture.
Step 2: Prep the Chicken
- Pat the chicken dry with a paper towel.
- Pound to even thickness (about ¾ inch) to ensure even cooking.
Step 3: Season the Chicken
- Brush both sides with olive oil or melted butter.
- Mix salt, pepper, garlic powder, onion powder, paprika, and Italian seasoning, then rub evenly on both sides.
- (Optional) Drizzle with lemon juice for a zesty kick.
Step 4: Arrange in a Baking Dish
- Place chicken breasts in a greased baking dish.
- (Optional) Add ¼ cup of chicken broth for extra moisture.
Step 5: Bake to Perfection
- Bake uncovered at 400°F for 20-22 minutes (or until internal temperature reaches 165°F).
- For thicker chicken (over 1 inch), bake for 25-30 minutes.
Step 6: Rest Before Slicing
- Let the chicken rest for 5-10 minutes before cutting—this helps retain juices!
Pro Tips for Perfectly Cooked Chicken
✅ Use a meat thermometer – This ensures the chicken is fully cooked without overcooking.
✅ For crispy edges, broil for the last 2-3 minutes of baking.
✅ For extra moisture, baste the chicken with its own juices halfway through cooking.
Now that your chicken is perfectly baked, let’s move on to Part 8: Best Side Dishes to Serve with Baked Chicken Breast. Let me know if you’re ready!
Best Side Dishes to Serve with Baked Chicken Breast
A perfectly baked chicken breast deserves the right side dishes to complete the meal. Whether you prefer healthy veggies, grains, or comfort foods, here are some delicious pairings to try.
Healthy Vegetable Sides
Adding nutrient-rich veggies balances the meal and enhances the flavors of baked chicken.
🥦 Roasted Garlic Broccoli – Toss broccoli with olive oil, garlic, salt, and pepper, then roast at 400°F for 15 minutes.
🥕 Honey-Glazed Carrots – Sauté sliced carrots in butter, honey, and a pinch of cinnamon for a slightly sweet side.
🥗 Greek Salad – Combine cherry tomatoes, cucumbers, red onion, feta cheese, and olives, then drizzle with olive oil and lemon juice.
🥬 Garlic Butter Green Beans – Blanch green beans, then sauté in garlic butter for a simple yet flavorful side.
Hearty Grains & Starches
If you want a filling, well-balanced meal, these starch-based sides pair perfectly with baked chicken.
🍚 Lemon Herb Quinoa – Cook quinoa in chicken broth and toss with fresh lemon juice, parsley, and olive oil.
🥔 Garlic Mashed Potatoes – Creamy mashed potatoes with roasted garlic and butter make the ultimate comfort food side.
🍞 Whole Wheat Dinner Rolls – Soft and warm rolls are perfect for soaking up extra chicken juices or sauce.
🌾 Brown Rice Pilaf – Cook brown rice with sautéed onions, garlic, and herbs for a flavorful, fiber-rich option.
Low-Carb & Keto-Friendly Options
For those on a low-carb diet, these sides complement baked chicken breast without adding extra carbs.
🥦 Cauliflower Rice – Lightly sauté riced cauliflower with garlic, butter, and herbs for a keto-friendly grain alternative.
🥒 Zucchini Noodles (“Zoodles”) – Toss spiralized zucchini with olive oil, parmesan, and a pinch of red pepper flakes.
🥑 Avocado & Tomato Salad – Mix diced avocado, cherry tomatoes, red onion, and lime juice for a refreshing side.
🍆 Roasted Brussels Sprouts – Roast with olive oil, balsamic vinegar, and bacon bits for a smoky, crispy finish.
Pro Tip:
🔹 Pairing Tip: If your chicken is heavily seasoned (Cajun, BBQ, or spicy rubs), go for mild sides like mashed potatoes or steamed veggies.
🔹 If your chicken is lightly seasoned, opt for bold-flavored sides like quinoa pilaf or roasted Brussels sprouts.
Storing & Reheating Baked Chicken Breast
If you’ve made extra chicken breast, proper storage and reheating are key to keeping it moist and flavorful for later meals.
How to Store Leftovers Without Drying Out
To keep baked chicken fresh and juicy, follow these steps:
✔️ Let it cool completely before storing to prevent condensation buildup.
✔️ Use an airtight container to prevent drying out.
✔️ Refrigerate for up to 4 days in a sealed container.
✔️ Freeze for up to 3 months – wrap in plastic wrap, then store in a freezer-safe bag.
👉 Pro Tip: Store sliced chicken with a little broth or sauce to keep it extra moist.
Best Reheating Methods to Retain Moisture
To avoid dry, rubbery chicken, use one of these moisture-locking reheating methods:
| Reheating Method | Steps | Best For |
|---|---|---|
| Oven (Best Method) | – Preheat oven to 325°F. |
- Place chicken in a baking dish.
- Add a splash of broth or water and cover with foil.
- Heat for 10-15 minutes. | Retaining original texture & juiciness |
| Stovetop (Quick & Easy) | – Heat a nonstick pan on medium-low. - Add a little olive oil or broth.
- Cover and warm for 5-7 minutes, flipping once. | Smaller portions & faster reheating |
| Microwave (Last Resort) | – Place chicken on a microwave-safe plate. - Add a damp paper towel on top.
- Heat in 30-second intervals until warm. | Super quick but can dry out chicken
👉 Avoid air fryers for reheating baked chicken—they can make it too dry.
Pro Tip for Meal Preppers
🔹 Slice or shred before storing for easier reheating.
🔹 Reheat only what you need—multiple reheats can make chicken tough.
🔹 Use leftovers creatively! Add to salads, wraps, tacos, pasta, or sandwiches for quick meals.
FAQs About Baked Chicken Breast
1. Is it better to bake chicken at 350°F or 400°F?
It depends on what texture you prefer:
350°F (177°C) – Slower cooking, softer texture, retains more moisture.
400°F (204°C) – Faster cooking, crispier edges, still juicy if not overcooked.
👉 For the best balance, bake at 400°F for 20-22 minutes to get a slightly crisp exterior while keeping the inside juicy.
2. What is the best way to cook chicken breast without drying it out?
To keep chicken moist and tender, follow these tips:
✔️ Brine or marinate before baking for extra juiciness.
✔️ Bake at 400°F for a shorter time rather than at lower temps for too long.
✔️ Use a meat thermometer—cook to 165°F (74°C) and no more.
✔️ Let it rest for 5-10 minutes before slicing to retain juices.
3. How do you keep chicken breast moist when baking?
Here’s how to lock in moisture:
✔️ Use olive oil or butter before baking.
✔️ Add chicken broth to the baking dish to create steam.
✔️ Cover with foil for the first half of baking (if cooking at 350°F).
✔️ Don’t overbake! Use a thermometer to avoid exceeding 165°F.
4. Should I bake chicken breast covered or uncovered?
Uncovered at 400°F – Best for a slightly crispier texture.
Covered (foil tent) at 350°F – Helps trap moisture for extra juiciness.
👉 Pro Tip: If baking at 400°F, you don’t need to cover it—but adding a bit of broth or butter helps retain moisture.
Conclusion: Mastering the Art of Juicy Baked Chicken Breast
Baked chicken breast is a healthy, protein-packed meal that can be incredibly delicious—if cooked the right way. By choosing the right temperature, seasoning, and moisture-locking techniques, you can enjoy juicy, flavorful chicken every time.
Key Takeaways:
Now that you know how to make the perfect baked chicken breast, it’s time to get cooking! Try different seasonings and side dishes to find your favorite combination.
✔️ Bake at 400°F for 20-22 minutes for the best texture.
✔️ Brine or marinate to maximize juiciness.
✔️ Use a meat thermometer to avoid overcooking.
✔️ Let chicken rest before slicing for the most moisture retention.
✔️ Pair with delicious side dishes for a complete meal.
