Introduction
Who doesn’t love a warm, flaky, and sweet Pop-Tart? While store-bought versions are convenient, homemade Pop-Tarts are a game-changer! They’re fresher, tastier, and you get full control over the ingredients. Plus, they don’t have preservatives or artificial flavors.
This homemade Pop-Tarts recipe will guide you through making buttery, flaky pastry filled with delicious fruity or chocolatey goodness. Whether you’re craving a classic strawberry pop-tart or want to try a creative twist like Nutella or peanut butter, this guide has got you covered.
In this article, you’ll learn:
✔ How to make Pop-Tart dough from scratch
✔ The best fillings, from fruit jam to chocolate
✔ Baking vs. air-frying Pop-Tarts
✔ Creative flavor ideas and storage tips
Let’s get started with the ingredients you’ll need!

Ingredients for the Perfect Homemade Pop-Tarts
Essential Ingredients for Pop-Tart Dough
A great pop-tart starts with the perfect flaky crust. Here’s what you’ll need:
| Ingredient | Purpose |
|---|---|
| All-Purpose Flour | The base of the pastry |
| Unsalted Butter (Cold & Cubed) | Creates a flaky texture |
| Granulated Sugar | Adds slight sweetness |
| Salt | Balances the flavors |
| Egg | Helps bind the dough |
| Milk or Heavy Cream | Adds moisture |
Different Fillings You Can Use
The best part about homemade Pop-Tarts? You can fill them with anything!
- Classic Fruit Fillings: Strawberry, raspberry, blueberry jam
- Chocolate Lovers: Nutella, chocolate ganache
- Nutty & Creamy: Peanut butter, almond butter, cream cheese
- Seasonal Twists: Pumpkin spice, caramel apple
Next, let’s go step by step on how to make the dough and assemble your Pop-Tarts.
How to Make Homemade Pop-Tarts Step-by-Step
Now that you have all the ingredients, it’s time to put everything together! Follow these simple steps to make flaky, golden, and delicious homemade Pop-Tarts.
Step 1: Making the Dough from Scratch
A good pop-tart crust should be buttery, flaky, and slightly crispy. Here’s how to make it:
Ingredients for the Dough:
- 2 ½ cups all-purpose flour
- 1 cup cold unsalted butter (cubed)
- 2 tablespoons granulated sugar
- ½ teaspoon salt
- 1 large egg
- 2 tablespoons milk or heavy cream
Instructions:
- Mix the dry ingredients – In a large bowl, whisk together the flour, sugar, and salt.
- Cut in the butter – Using a pastry cutter (or your hands), mix the butter into the flour until you get pea-sized crumbs.
- Add wet ingredients – Stir in the egg and milk until the dough comes together. If it feels too dry, add a little more milk.
- Chill the dough – Form the dough into a disc, wrap it in plastic wrap, and refrigerate for at least 30 minutes. This makes it easier to roll out.
Step 2: Preparing the Pop-Tart Filling
While the dough is chilling, prepare your favorite filling. Here’s how to make a simple fruit filling:
Strawberry Jam Filling Recipe
- ½ cup strawberry jam or preserves
- 1 tablespoon cornstarch (to thicken)
- 1 tablespoon water
Instructions:
- In a small saucepan, mix jam, cornstarch, and water over low heat.
- Stir constantly until the mixture thickens (about 3-5 minutes).
- Let it cool completely before using.
Other filling ideas: Nutella, peanut butter, chocolate ganache, or apple cinnamon!
Step 3: Rolling Out & Cutting the Dough
- Flour your surface – Lightly dust your counter with flour to prevent sticking.
- Roll out the dough – Use a rolling pin to roll the dough into a ¼-inch thick rectangle.
- Cut into rectangles – Use a knife or a pizza cutter to make 3×5 inch rectangles. You should have an even number for the top and bottom layers.
Step 4: Assembling & Sealing the Pop-Tarts
- Place filling on half of the rectangles – Leave about ½ inch of space around the edges.
- Cover with another dough rectangle – Gently place a second rectangle on top.
- Seal the edges – Use a fork to crimp the edges tightly. This keeps the filling from leaking out.
- Poke holes on top – Use a fork to prick small holes to let steam escape while baking.
- Brush with egg wash – This gives the pop-tarts a golden, flaky crust.
Step 5: Baking the Pop-Tarts
- Preheat oven to 375°F (190°C).
- Line a baking sheet with parchment paper and place the pop-tarts on it.
- Bake for 18-22 minutes, or until golden brown.
- Cool before glazing – Let them cool completely before adding icing.
Alternative: Want a faster method? You can air-fry Pop-Tarts at 350°F for 8-10 minutes!
Baking vs. Air-Frying Pop-Tarts – Which Is Best?
Now that you’ve assembled your homemade Pop-Tarts, it’s time to bake or air-fry them. But which method is better? Let’s compare the pros and cons of both techniques.
Baking Pop-Tarts: The Classic Method
How to Bake Pop-Tarts:
- Preheat oven to 375°F (190°C).
- Line a baking sheet with parchment paper.
- Place Pop-Tarts on the tray with space between them.
- Bake for 18-22 minutes until golden brown.
- Let cool completely before glazing.
Pros of Baking:
✔ Traditional method for making flaky pastry.
✔ Even browning and crisp texture.
✔ Can bake multiple Pop-Tarts at once.
Cons of Baking:
✘ Takes longer (around 20 minutes).
✘ Requires preheating the oven.
Air-Frying Pop-Tarts: A Faster Option
How to Air-Fry Pop-Tarts:
- Preheat air fryer to 350°F (175°C).
- Place Pop-Tarts in the air fryer basket, leaving space between them.
- Cook for 8-10 minutes, flipping halfway through.
- Cool before adding icing.
Pros of Air-Frying:
✔ Faster cooking time (ready in 8-10 minutes).
✔ No need to preheat the oven.
✔ Crispy texture without using too much oil.
Cons of Air-Frying:
✘ Can’t cook too many at once.
✘ Might brown unevenly compared to baking.
Which Method is Better?
If you’re making a large batch, baking is more efficient since you can cook many Pop-Tarts at once. But if you’re in a hurry, air-frying is a quick and easy option that still gives you a crispy, flaky texture.
No matter which method you choose, your homemade Pop-Tarts will be golden, delicious, and way better than store-bought!

Creative Pop-Tart Variations and Fillings
Homemade Pop-Tarts are fun to customize, and the possibilities for flavors are endless! Whether you love classic fruit fillings or want to try something completely unique, here are some delicious ideas.
1. Classic Fruit-Filled Pop-Tarts
If you love the original fruity Pop-Tarts, try these homemade versions:
| Flavor | Filling Ingredients |
|---|---|
| Strawberry | Strawberry jam + cornstarch + lemon juice |
| Blueberry | Blueberry preserves + sugar + cinnamon |
| Raspberry | Raspberry jam + a splash of vanilla |
| Apple Cinnamon | Applesauce + brown sugar + cinnamon |
Tip: Mix 1 tablespoon cornstarch with 1 tablespoon water to thicken fruit fillings!
2. Chocolate & Nutty Pop-Tarts
For a richer, dessert-like treat, try these chocolatey and nutty flavors:
| Flavor | Filling Ingredients |
|---|---|
| Nutella | Nutella or chocolate hazelnut spread |
| Peanut Butter & Jelly | Peanut butter + strawberry jam |
| Chocolate Ganache | Melted dark chocolate + heavy cream |
| Cookies & Cream | Crushed Oreos + cream cheese |
Tip: For extra indulgence, dip the baked Pop-Tarts in melted chocolate!
3. Unique & Seasonal Pop-Tart Flavors
Want something different? These creative flavors will impress everyone:
| Flavor | Filling Ingredients |
|---|---|
| Pumpkin Spice | Pumpkin puree + cinnamon + nutmeg + sugar |
| Salted Caramel | Thick caramel sauce + sea salt |
| Matcha White Chocolate | Matcha powder + melted white chocolate |
| S’mores | Marshmallow fluff + melted chocolate + crushed graham crackers |
Tip: For an authentic S’mores Pop-Tart, toast the pastry edges slightly for a crunchy texture!
4. How to Make Gluten-Free Pop-Tarts
For a gluten-free version, swap regular flour for gluten-free 1:1 baking flour. The texture may be slightly different, but they’ll still be flaky and delicious!
How to Store and Reheat Homemade Pop-Tarts
Once you’ve made a batch of delicious homemade Pop-Tarts, you’ll want to store them properly to keep them fresh and tasty. Here’s how to store and reheat them for the best flavor and texture.
How to Store Homemade Pop-Tarts
1. Storing at Room Temperature (Best for Short-Term Storage)
- Let the Pop-Tarts cool completely before storing.
- Place them in an airtight container or ziplock bag.
- Keep them at room temperature for up to 3 days.
Tip: If your kitchen is warm, store them in the fridge instead to prevent spoilage.
2. Refrigerating Pop-Tarts (For Longer Freshness)
- Store in an airtight container with parchment paper between layers.
- Keep in the refrigerator for up to 1 week.
Tip: Refrigeration keeps them fresh, but it can make the crust slightly softer. Reheat for a crispy texture!
3. Freezing Pop-Tarts (Best for Meal Prep)
Want to make Pop-Tarts in advance? Freezing is the best option!
- Place cooled Pop-Tarts on a baking sheet and freeze for 1 hour.
- Transfer to a freezer-safe bag and label with the date.
- Store in the freezer for up to 3 months.
Tip: Freeze before or after baking! Unbaked frozen Pop-Tarts can be baked directly from frozen (just add 3-5 extra minutes of baking time).
How to Reheat Homemade Pop-Tarts
When you’re ready to enjoy your homemade Pop-Tarts, here’s how to reheat them perfectly:
| Method | Instructions | Time |
|---|---|---|
| Oven (Best for crispy texture) | Preheat to 350°F (175°C), place on a baking sheet, bake until warm. | 8-10 mins |
| Toaster (Quick and easy) | Toast on low setting to avoid burning. | 2-3 mins |
| Air Fryer (For a crispy finish) | Heat at 350°F (175°C). | 3-5 mins |
| Microwave (Fast but softens crust) | Heat for 10-15 seconds. | 10-15 secs |
Tip: For extra flavor, spread butter on top before reheating!

Tips for Perfect Pop-Tarts Every Time
Making homemade Pop-Tarts is easy, but a few pro tips can take them from good to bakery-quality delicious. Here’s how to make sure your Pop-Tarts turn out flaky, crispy, and full of flavor every time!
1. Preventing Soggy Crusts
A soggy crust can ruin your Pop-Tart! Here’s how to keep them perfectly crisp:
✔ Chill the dough – Let the dough rest in the fridge for at least 30 minutes before rolling it out.
✔ Use cold butter – Cold butter creates a flakier crust.
✔ Don’t overfill – Too much filling can cause the crust to get soggy.
✔ Seal the edges well – Use a fork to crimp tightly and prevent leaks.
✔ Poke holes on top – This lets steam escape and prevents a soggy bottom.
2. How to Make Pop-Tarts Extra Flaky
✔ Roll the dough thin – Aim for ¼ inch thickness for a delicate, crispy crust.
✔ Use an egg wash – Brushing the tops with beaten egg + milk makes them golden and crispy.
✔ Bake at the right temperature – 375°F (190°C) is perfect for a crisp, golden-brown crust.
3. Getting the Perfect Filling-to-Crust Ratio
✔ Don’t overfill – Use 1-2 tablespoons of filling per Pop-Tart.
✔ Leave space at the edges – About ½ inch of space around the edges prevents leaks.
Tip: If your filling is too runny, thicken fruit jams with cornstarch before using!
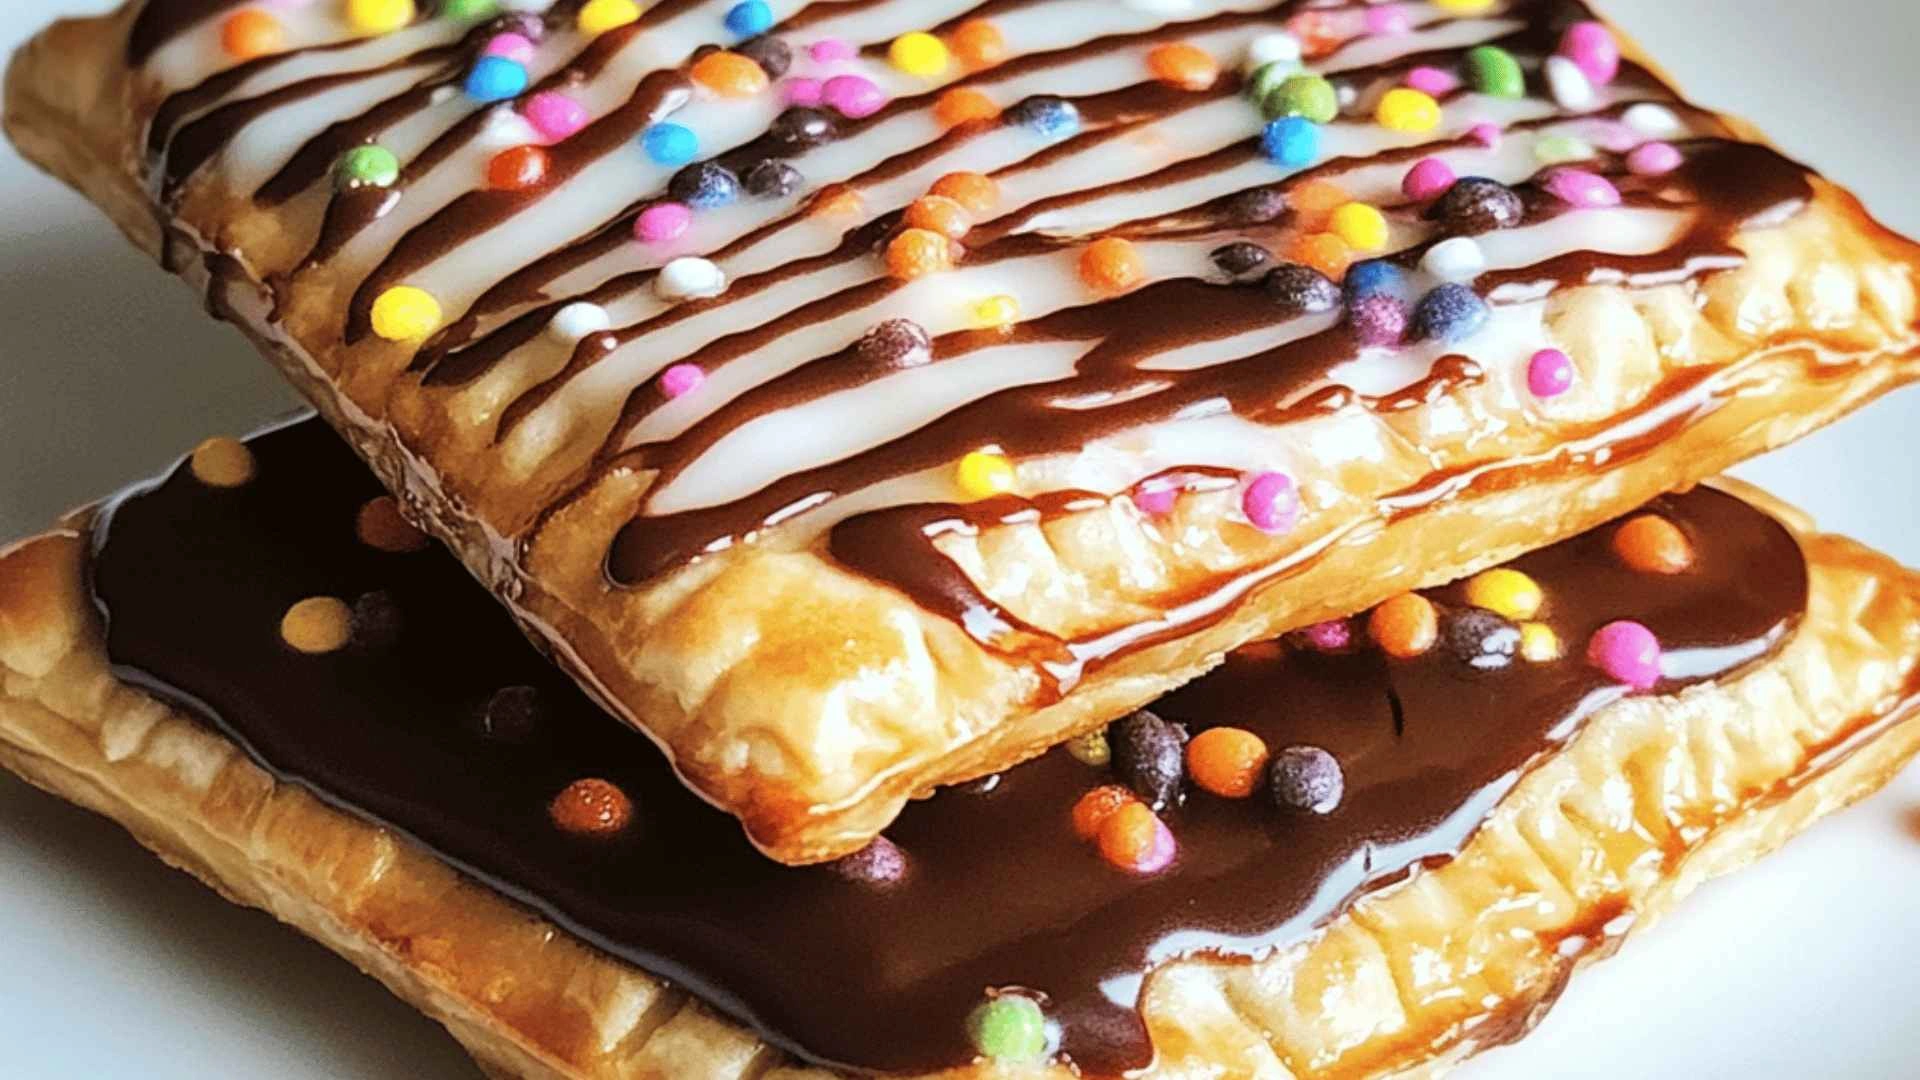
4. Making the Perfect Glaze & Toppings
A great Pop-Tart isn’t complete without a sweet glaze!
Easy Pop-Tart Icing Recipe
- 1 cup powdered sugar
- 2 tablespoons milk
- ½ teaspoon vanilla extract
Instructions:
- Whisk everything together until smooth.
- Drizzle or spread over cooled Pop-Tarts.
- Add sprinkles, crushed nuts, or drizzled chocolate for extra flair!
Tip: Let the glaze harden for 10 minutes before serving for the best texture!
5. Avoiding Common Pop-Tart Mistakes
❌ Crust is too hard? Dough was overworked—handle it gently!
❌ Pop-Tart is too dry? Add a little more milk to the dough.
❌ Filling is leaking? Make sure to seal the edges tightly with a fork.
❌ Pastry isn’t golden? Brush the tops with an egg wash before baking.
Frequently Asked Questions (FAQs)
Here are answers to some of the most common questions about homemade Pop-Tarts.
1. What is the filling in Pop-Tarts made of?
The filling in Pop-Tarts is typically made from fruit preserves, sugar, cornstarch, and flavoring. Homemade versions can include real fruit jam, chocolate, peanut butter, or even cream cheese for a richer taste.
2. What is the crust of a Pop-Tart made of?
Pop-Tart crust is a buttery, flaky pastry, similar to pie dough. It’s made with all-purpose flour, butter, sugar, salt, egg, and milk for a tender texture.
3. What are the ingredients of a Pop-Tart?
A homemade Pop-Tart consists of:
✔ Dough – Flour, butter, sugar, egg, and milk
✔ Filling – Fruit jam, chocolate, peanut butter, or other spreads
✔ Glaze (optional) – Powdered sugar, milk, and vanilla
Store-bought Pop-Tarts contain preservatives, artificial flavors, and high fructose corn syrup, which homemade versions avoid.
4. Can I use pie crust for a tart?
Yes! Pie crust can be used as a shortcut for making Pop-Tarts. However, it’s softer than traditional Pop-Tart dough, so the texture may be slightly different. If using pie crust, bake at a lower temperature (350°F) to prevent burning.
5. Why do people put butter on Pop-Tarts
Spreading butter on a warm Pop-Tart enhances the flavor and adds richness. It also softens the pastry slightly, making it even more indulgent. Try it on flavors like cinnamon sugar or chocolate!
6. Why is xanthan gum in Pop-Tarts?
Xanthan gum is a thickener and stabilizer used in store-bought Pop-Tarts to improve texture and shelf life. In homemade Pop-Tarts, it’s not necessary, as fresh ingredients provide natural texture.
Conclusion & Final Thoughts
Making homemade Pop-Tarts is easier than you think, and the results are so much better than store-bought! With a flaky, buttery crust, your choice of delicious fillings, and a sweet glaze on top, these pastries are a treat you can enjoy for breakfast, snacks, or dessert.
Why You Should Try Homemade Pop-Tarts
✔ Healthier ingredients – No preservatives or artificial flavors
✔ Customizable flavors – Try strawberry, Nutella, or even s’mores!
✔ Fun to make – Great for kids and family baking days
✔ Perfect for meal prep – Store them for later and toast when needed
Whether you bake or air-fry them, these homemade Pop-Tarts are guaranteed to be crispy, golden, and filled with deliciousness. Try different flavors, experiment with toppings, and enjoy your homemade pastries anytime!
Looking for More Delicious Recipes?
Discover great ideas like Homemade Croissants or Easy Breakfast Pastries for more homemade treats!
